kuniga.me > NP-Incompleteness > Monitoring System using Raspberry Pi
Monitoring System using Raspberry Pi
29 Jul 2017
A few months ago, I described how to use a Raspberry Pi to setup a domestic server. In this post we’ll see how to take snapshots using the Pi and a camera, so combining it with the server, we can create a simple monitoring system accessible from a phone.
Node.js server
First thing we have to do is to run another server, separate from nginx to handle the requests. nginx is a very basic server that can’t do much else, but it’s capable of forwarding requests/responses.
I chose Node.js because I’m familiar with JavaScript and haven’t used much Node.js, such it was a good learning opportunity.
To install it, first we need to find out which architecture our Pi’s processor is. The Raspbian has the command arch which tells returned armv6l in my case. This tells us which version to pick from the Node.js site. We can install it manually by downloading and unpacking it:
cd ~/Downloads
wget [https://nodejs.org/dist/v6.9.2/node-v6.9.2-linux-armv6l.tar.xz](https://nodejs.org/dist/v6.9.2/node-v6.9.2-linux-armv6l.tar.xz)
tar xf node-v6.9.2-linux-armv6l.tar.xz
We can put it in a local directory (no need for sudo). We move it to a convenient place:
mv ~/Downloads/node-v6.9.2-linux-armv6l workspace/nodeand then make sure that path is being looked for when running executables:
export PATH="$HOME/workspace/node/bin:$PATH"Now we need to tell nginx to forward requests to another IP address, which our Node.js server will be listening to, by adding this to /etc/nginx/sites-available/default:
location / {
    proxy_set_header X-Real-IP $remote_addr;
    proxy_set_header X-Forwarded-For $proxy_add_x_forwarded_for;
    proxy_set_header Host $http_host;
    proxy_set_header X-NginX-Proxy true;
    proxy_pass http://127.0.0.1:3000;
    proxy_redirect off;
}
Finally we create a very simple Node.js application that listens to localhost (127.0.0.1), port 3000, and servers an HTML file as response:
var http = require('http');
var url = require('url');
var fs = require('fs');

// Read the HTML file
var htmlFile;
fs.readFile('./response.html', function(err, data) {
    if (err) {
        throw err;
    }
    htmlFile = data;
});

http.createServer(function (request, response) {
    response.writeHead(200, {'Content-Type': 'text/html'});
    response.end(htmlFile);
}).listen(3000, "127.0.0.1");
console.log('server running');
Camera
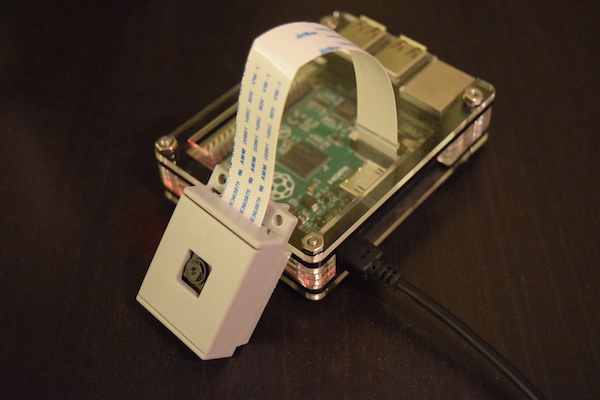
I got the Raspberry PI 5MP Camera Board Module to take the still photos. It’s an official product from Raspberry pi, so it comes with some nice integrations.
In particular, I was interested in the raspistill utility.
It has a few parameters and image transformation options, and we can specify an output file to which an image will be saved in JPEG format.
raspistill -w 600 -h 400 -rot 180 -o images/image.jpgPutting things together
The basic idea of this system is that whenever we hit our webpage, it will take a snapshot using the camera and display the image.
Because it takes some time for a photo to be taken, we do it asynchronously. In the meantime it shows the latest snapshot it had on file.
To avoid overloading the Pi we debounce snapshot commands and only take a new snapshot after at least a minute since the previous one. I wrote a bash script to handle that:
#!/bin/bash

# Get the timestamp of the image
imgTs=$(stat -c %Y images/image.jpg)
# 1 minute
waitSeconds=60
nextTime=$(($imgTs + $waitSeconds))

now=$(date +%s)

if [ "$now" -ge "$nextTime" ]; then
    # Ready to take a new snapshot
    raspistill -w 600 -h 400 -rot 180 -o images/image.jpg
    echo $now
    echo ' - done taking snapshot'
else
    echo $now
    echo ' - need to wait'
Now we just need out Node.js app to call this script asynchronously:
...

http.createServer(function (request, response) {
    response.writeHead(200, {'Content-Type': 'text/html'});
    response.end(htmlFile);

    // Take a screenshot asynchronously
    var handler = function(erro, stdout, stderr) {
        console.log(stdout);
    }

    exec('./snapshot.sh', handler);

}).listen(3000, "127.0.0.1");

...
Conclusion
This simple project was inspired by a friend, who used a Raspberry Pi + camera to monitor his apartment during his vacation. I copied the idea with the intention to learn about the process and put the Pi I bought a couple of years back to use.
I haven’t actively used this system, but it was fun to work on it and I’m now looking forward on working on other “home” projects.
