kuniga.me > NP-Incompleteness > Domestic server using Raspberry Pi
Domestic server using Raspberry Pi
16 Jan 2017
There are tons of tutorials on setting up a domestic server using a Raspberry Pi. I’ll add one more to the mix by describing my experience and lessons learned in creating a simple server.
Before starting, let’s first introduce some concepts and terminology. If you already know the basics of IP (Internet Protocol), feel free to skip to the next section (Hardware).
Introduction
The scenario we’re using as example is a typical home setup, in which we have a bunch of devices that are able to access the internet through a router. The connection between these devices and the router form a private network.
IP Address. The router is assigned a public IP address by the ISP (Internet Service Provider - e.g. Comcast, AT&T, Verizon, etc). This IP usually changes from time to time, so it’s also called dynamic IP.
An IP (IPv4) address is a 32-bit integer often written in 4 groups separated by dots. For example, 172.16.254.1. The creators of the IP address didn’t envision such an explosive growth of the internet and we’re now running out of IPv4 addresses. With that in mind, a new version, called IPv6, was designed, which uses 128 bits. IPv6 is not fully deployed yet, and for the purpose of this tutorial we’ll assume IPv4 throughout.
Public and Private IP Addresses. Because of the shortage of IPv4 addresses, we don’t have the luxury to assign a unique IP address to every possible device that exists. To work with that, only the router has a unique IP address (public IP). The devices in the local network as assigned what we call private IPs. While within one local network private IPs addresses must be unique, they don’t have to be unique across multiple local networks (for example, my laptop might have the same private IP address as yours but my router will have a different public IP address than yours).
To avoid confusion and routing problems, the set of IP public and privates addresses are disjoint. The private IPs must fall within these 3 ranges: (10.0.0.0 to 10.255.255.255), (172.16.0.0 to 172.31.255.25) and (192.168.0.0 to 192.168.255.255).
It’s up to the router to assign the IP addresses to the devices in local area network.
Let’s analyze two use cases: a computer acting as a client and another where it acts as a host.
Client. A computer in the private network mostly acts as a client to some remote server, for example, when we open an URL using a browser (aka agent) and receive back some HTML page.
Behind the scenes, first we need to resolve the URL to an actual IP address (the address of the host that will serve the HTML page). The operating system will request this by talking to a DNS server, which has a mapping from domains to IPs.
Then it executes an HTTP (or HTTPS) request to that remote address, using port 80. Since we need to receive the response back, we also need to send the source’s IP. The problem is that the IP of the sender is a private IP and is not supposed to be used externally. To avoid that, the router will assign a random port and associate to that private IP address and send its own public IP address plus this random port, so that when it receives the response back it can route it back to the computer. Because it translates an internal IP to external IP and vice-versa, we also say the router is a NAT (Network Address Translation) gateway.
Server. In a less common scenario, and one which we explore in this tutorial, is when one computer in our private network serves as a host that external agents can talk to.
In this case we need to register a domain to get a user-friendly URL that maps to our external IP. We also need to instruct the router how to route the request to the computer acting as host. Since the external agent doesn’t know about the internals of our network, only about the external IP address, we manually need to tell the router what to do, and we do this via port forwarding. When a request to our external IP is made with a specific port, we’ll have a rule which tells the router to forward the request to a specific private IP address.
Wikipedia has much more information on this subject. With this brief introduction, we’re ready to start the tutorial:
Hardware
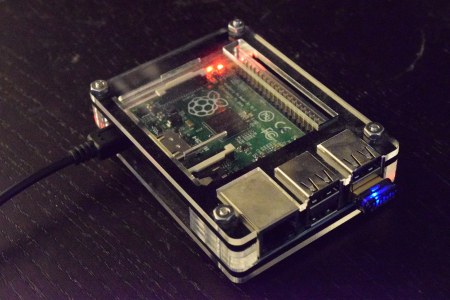
I got the Raspberry Pi Model B+ (back in 2014), but as of January 2017, there’s already the Raspberry 3 Model B with much better specs. For the record, my pi has the following specs:
- CPU: 700MHz Broadcom BCM2835, ARM architecture
- RAM: 512 MB SDRAM @ 400MHz
- 10/100 Ethernet RJ45 on-board network
As peripherals:
- Wi-fi USB card: Edimax 150Mbs
- SD card for storage: Samsung EVO 32GB of space and 48MB/s transfer.
- Zebra Case (see photo below)
- A micro USB power adapter (5V/2000mA)
All these totalled around ~$100.
Software
OS. I decided to try the Raspbian OS, which is a fork of Debian (wheezy) adapter for Raspberry. We first download it and write the image to the SD card.
We can then insert the card into the Raspberry Pi and connect a monitor/keyboard/mouse. The boot process will ask us to fill in some information and should be straightforward. The wi-fi adapter worked out of the box.
SSH. After installed, it felts very sluggish to run GUI, so I decided to do everything through SSH. The instructables has a very detailed guide for enabling it through the UI. After changing the password as instructed in the guide, I go the internal IP of the Pi using
hostname -II can then connect through:
ssh pi@<IP>We can then install everything through command line.
Text editor and webserver. I installed my favorite editor and the server nginx (we could have used Apache’s HTTP server alternatively).
sudo apt-get update
sudo apt-get install emacs nginx
To test if the server is installed properly, we can run it out of the box:
sudo /etc/init.d/nginx startIf you put the Pi’s IP on the browser address bar in your laptop you should be able to see the default page served.
Server Configuration
We can make some changes in the default nginx config to ease development.
We can edit the configuration file /etc/nginx/sites-available/default (has to be sudo). The first thing I changed is for it to read files from my home folder instead of /usr/share/nginx/www
server {
    root /home/pi/www;
}
Since I’m using for private purposes, I turned HTTP authentication on. First we need to register a login entry in a .htpasswd file using htpasswd application. This can be obtained in Debian via
sudo apt-get install apache2-utilsThen we run:
sudo htpasswd -c /etc/nginx/.htpasswd <USER>replacing with the username you’ll provide at login. When running the command above, you’ll be prompted to provide the password. The user name and an encrypted password will be saved to /etc/nginx/.htpasswd. Now we can configure nginx to use credentials from that file to perform the access check:
server {
    ...
    auth_basic "Private Site";
    auth_basic_user_file /etc/nginx/.htpasswd;
}
We can now add a custom HTML file to /home/pi/www (or whatever path you put in the nginx config), such as /home/pi/www/index.html
<html>
  <title>Pi's webpage</title>
  <body>
    Hello world
  </body>
</html>
Restart the server and reload the page, and you should get the new custom page!
sudo /etc/init.d/nginx restartIn a future post we’ll see how to work with a Node.js server, but this is as far as we’ll go in this first tutorial.
Network Configuration
Static Internal IP. To make sure the internal IP of the Pi doesn’t keep changing you might need to configure your router. My router is a MediaLink 300N, which stores a table of MAC addresses (a unique identifier for your hardware) to internal IPs automatically so I don’t have to do anything.
Static External IP. The remaining problem is your external IP. Unless you have asked for static IP, chances are that your ISP (mine is Comcast) will change the external IP from time to time, so you don’t have much control over that.
Dynamic DNS. To solve that, first we need to get a domain (I registered a new one via Google domains). You can configure it to point to a specific IP (your external IP) which will be stored in a DNS. The problem, as we said, is that your external IP might change, so we need to update the mapping from periodically.
We don’t want to do this manually, so we can use a system like ddclient which runs a daemon on your server machine (the Pi in our case) that will periodically check the external IP and update the DNS entry with the new IP in case it has changed.
To install we can simply do
sudo apt-get install ddclientWe then need to configure it so it knows where to go to update the entry. The file lives in /etc/ddclient.conf (need to edit as sudo). The configuration will depend on what is your domain provider. For google domains it will look like:
protocol=dyndns2
use=web
server=domains.google.com
ssl=yes
login=<LOGIN>
password='<PASSWORD>'
<DOMAIN NAME>
There’s a good tutorial for how to setup ddclient using Google domains.
To run the daemon, we can do
sudo ddclient -debugPort Forwarding. When we access an URL like http://site.kunigami.info/, it’s implicitly assuming port 80 when routing that domain to the actual IP. We’ll need to tell our router to forward that request to a specific internal IP (otherwise how does it know whether it should go to your laptop or the pi?). Most routers offer a way to perform this mapping, which is also known as port forwarding.
For my MediaLink router it’s under Advanced Settings > Virtual Server > Port Range Forwarding.
NOTE: There’s one current issue I haven’t been able to figure out. The port forwarding seem to only work if I access it from outside of my local network, that is, through my phone network or via some VPN. It might be some issue with MediaLink.
Related Posts
Mentioned by Network Sockets.
Conclusion
In this post we learned some details of the Internet Protocol and learned how to configure a Raspberry Pi to act as a server in a domestic network.
References
- [1] How-To Geek - How to Forward Ports on your Router.
- [2] Wikipedia - IP address
- [3] Server Fault - How does the HTTP GET method work in relation to DNS protocol?
- [4] Wikipedia - Classful network
- [5] Page to test if a specific port is open and being forwarded
- [6] Setting up a nginx server on a Raspberry Pi
